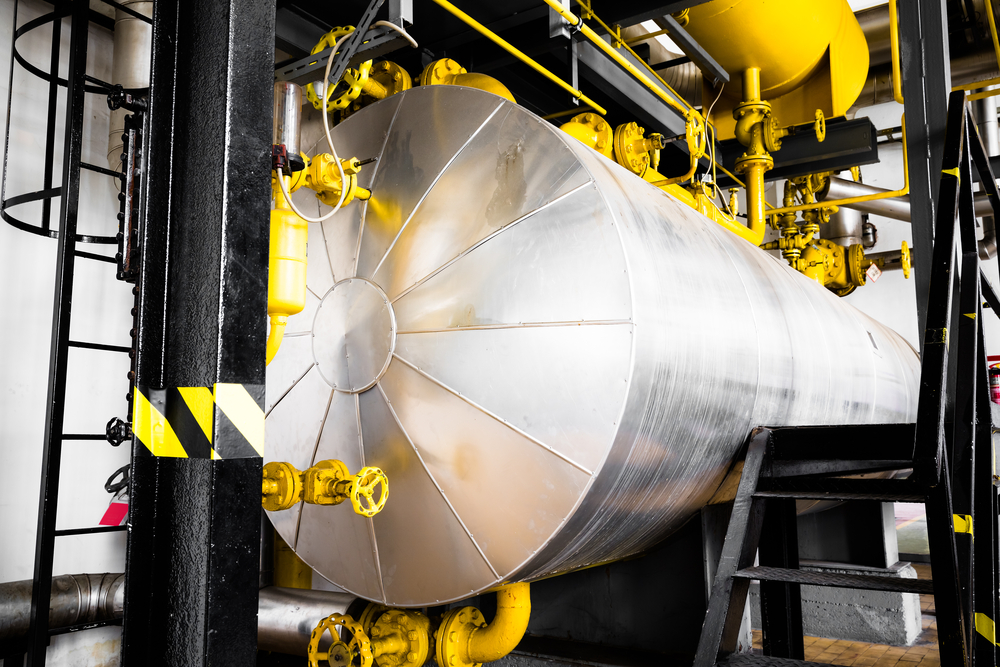
Wineries, breweries, and distilleries depend heavily on precise temperature control to produce beverages that meet high standards and deliver exceptional taste profiles. Professional chiller services play a critical role in achieving these goals. Whether it’s winery chiller repair in Eugene, OR, brewery refrigeration services in Oregon, or distillery equipment installation in Eugene, partnering with experts ensures efficiency, quality, and compliance. In this blog, we’ll explore how professional chiller services transform operations for beverage producers and why they are a valuable investment.
The Importance of Temperature Control in Beverage Production
Temperature regulation is at the heart of every successful winery, brewery, and distillery. Even slight fluctuations can impact fermentation rates, alter flavor profiles, and affect product stability. Professional chiller services provide customized solutions designed to manage precise temperatures throughout production, storage, and distribution.
For wineries, chiller systems ensure that fermentation occurs at ideal temperatures, preventing spoilage and preserving flavor integrity. When wineries rely on experts for winery chiller repair in Eugene, OR, they benefit from highly calibrated systems designed specifically for delicate winemaking processes. Similarly, breweries require brewery refrigeration services in Oregon to maintain consistent cooling across multiple production stages, from mashing and fermentation to packaging. Distilleries, on the other hand, depend on specialized distillery equipment installation in Eugene to handle cooling during both fermentation and distillation cycles.
Investing in professional services minimizes operational risks and ensures beverages retain their intended quality, even under high production demands.
Enhancing Efficiency and Reducing Downtime
Operational efficiency is one of the most significant benefits of professional chiller services. Production schedules in wineries and breweries often run on strict timelines, meaning that any equipment failure or temperature disruption can lead to costly delays or compromised product quality.
Professional service providers offer preventive maintenance, rapid diagnostics, and reliable winery chiller repair in Eugene, OR, ensuring that downtime is minimized. Brewery refrigeration services in Oregon also prioritize equipment optimization, enabling brewers to scale operations while maintaining consistent output quality.
For distilleries, efficient cooling systems installed by experts reduce energy waste and improve overall production timelines. A properly installed system keeps processes smooth and predictable, allowing operators to meet deadlines and satisfy growing consumer demand. Whether it’s emergency repair or routine inspection, having professionals on call means production rarely stops, and profit margins remain protected.
Protecting Product Quality and Compliance
In addition to operational benefits, professional chiller services play a critical role in maintaining quality standards and regulatory compliance. Beverage producers must adhere to strict health and safety guidelines, and improperly maintained refrigeration systems can jeopardize both product safety and business reputation.
Wine vault refrigeration services are a prime example of how specialized solutions preserve product value. Proper temperature and humidity control ensure wines age gracefully and maintain their intended flavor profiles. Breweries also require highly controlled environments to prevent contamination and spoilage, making professional brewery refrigeration services in Oregon essential for quality assurance.
For distilleries, expert distillery equipment installation in Eugene ensures that cooling systems meet safety regulations while optimizing performance. Professionals understand industry standards, including FDA and TTB guidelines, and provide solutions that help beverage producers avoid costly fines or product recalls. By partnering with experts, wineries, breweries, and distilleries can deliver consistent, safe, and high-quality products to their customers.
Long-Term Cost Savings and Energy Efficiency
While investing in professional chiller services may seem costly upfront, it provides significant long-term savings. Poorly maintained systems often consume more energy, experience frequent breakdowns, and require expensive emergency repairs. In contrast, professional technicians design and maintain systems for maximum energy efficiency, lowering operational costs over time.
For example, wineries that rely on expert winery chiller repair in Eugene, OR, can significantly extend the lifespan of their equipment while keeping energy consumption in check. Breweries that utilize brewery refrigeration services in Oregon benefit from system optimizations that reduce waste, minimize water usage, and enhance sustainability. Similarly, distilleries investing in professional equipment installation gain access to advanced technology that integrates energy-efficient components, reducing monthly utility costs.
Energy-efficient systems also align with broader environmental goals, which can enhance a brand’s reputation. By adopting sustainable cooling solutions, wineries and breweries can appeal to eco-conscious consumers while saving money on operational expenses.
The Value of Expertise and Ongoing Support
Perhaps the most overlooked benefit of professional chiller services is the long-term partnership they provide. From initial installation to regular maintenance and emergency repair, having a trusted service provider ensures businesses always have access to expert support.
For wineries, consistent monitoring of systems through reliable winery chiller repair in Eugene, OR, guarantees year-round protection for valuable wine stocks. Breweries leveraging brewery refrigeration services in Oregon benefit from tailored service plans designed to meet production goals and adapt to seasonal demand fluctuations. Distilleries working with professionals on equipment installation in Eugene gain peace of mind knowing their systems are configured for maximum performance from day one.
In addition, providers often offer 24/7 emergency response, ensuring problems are addressed before they escalate. This proactive approach safeguards productivity, protects inventory, and fosters long-term operational stability.
Conclusion
For wineries, breweries, and distilleries, investing in professional chiller services is not just a matter of convenience—it’s a necessity for maintaining quality, efficiency, and profitability. Whether it’s winery chiller repair in Eugene, OR, brewery refrigeration services in Oregon, distillery equipment installation in Eugene, or specialized wine vault refrigeration services, expert solutions ensure production runs smoothly and products reach consumers in their optimal condition.
By leveraging the expertise of professional technicians, beverage producers gain more than equipment maintenance—they gain a trusted partner dedicated to their success. As the demand for premium beverages continues to grow, businesses that prioritize high-performance chiller systems and proactive care will remain competitive in a crowded market. Investing in the right services today lays the foundation for long-term growth, operational efficiency, and exceptional product quality.
Need Commercial Refrigeration, Heating and Cooling in Eugene, OR?
Call American Refrigeration for all your commercial heating, ventilation & cooling needs! Founded in 1995, American Refrigeration has been proudly serving the Eugene & Portland areas with honesty & integrity for over 19 years. We specialize in commercial HVAC, air conditioning & heating repair, including medical laboratories and winery chillers. Emergency Repair is available 24/7 and we honor manufacturer rebates & warranties. Contact us today!
If you’ve been wondering how to make mead at home or are just interested in improving your DIY mead homebrew, you’ve come to the right place. One of the oldest spirits that have been documented throughout history, making mead is a relatively simple process that any legal adult can partake in.
Interested in learning more? Read on to improve (or start) your DIY mead homebrew.
Gather Supplies and Ingredients
For a one-gallon DIY mead homebrew, you will want a gallon carboy, fermentation bucket, hydrometer, and an auto-siphon with tubing and clamp. If you want to play it safe, there are complete mead homebrew kits you can purchase online, such as this one.
Once you’ve gathered your supplies, it’s time to get the ingredients! A basic mead recipe calls for
3 pounds of grade A honey
One gallon of filtered water (divided)
1/2 packet of bread yeast
Nutrients for your yeast (such as raisins, fruits, or bee pollen)
If needed: simple syrup for sweetening bitter mead
Step-by-Step Guide to DIY Mead Homebrew
Now that you’ve got the ingredients gathered and equipment rounded up, let’s talk about how to make mead at home.
1. Sanitize
Anything your equipment comes into contact with will need to be disinfected. You can do this with bleach or by simply boiling your equipment.
2. Make the must
Heat (don’t boil) 2/3 gallon of water, and then stir in the honey. Once this is done, add your nutrients (fruits, raisins, bee pollen, etc.). You can also add spices here to make your recipe more customized. Just make sure you stir well after each step.
Let this mixture cool for approximately 10 minutes.
3. Pour into the jug
After your must has cooled, use the funnel to pour it into the one-gallon jug. Next, incorporate the remaining cool water and use an airlock to place the bung. Let this sit at room temperature until the bottle is no longer warm to the touch, and then add your yeast.
4. The waiting game
After about two days of fermenting, you should start seeing bubbles. This means it’s time to place your DIY mead homebrew into a dark area of your home. Check the mead every two to three days to ensure it is still bubbling for the first month, at which point the fermentation process will slow down. Once the mead is clear and you see the lees at the bottom of your jug, you can give it a taste test. Just be cautious! At this point, your mead is ready to go. Unless…
5. Too bitter?
If your mead is too bitter, don’t freak out! Simply sterilize your equipment and make a simple syrup. Pour it into a new gallon jug and funnel the mead into it, swirling once it is incorporated. Place your sanitized airlock, let it sit for a few weeks, and then give it another taste.
You can bottle the mead once you no longer see bubbles.
Once a potential beer maker has obtained DIY home brew equipment, they have already taken their first and most crucial step toward making beer at home. Knowing how to make beer may seem like a task beyond most people’s comprehension, but, in reality, it only takes simple ingredients when it is time to get started.
Four key ingredients are needed to make beer at home, and they are all readily available. Water, yeast, malt and hops are all that is required. As the beer maker familiarizes themselves with all of the ingredients, they can develop their own variations on the classic recipes. Knowing how to use adjuncts and fining agents is of utmost importance.
That’s why it is pivotal for would-be-at-home beer makers to read on to learn more about the primary ingredients, as well as adjuncts and fining agents. This guide is here to help!
Malt/Malt Extract
When it comes to fermentable sugar in beer, malt is the primary source. Before brewing grade barley is sold to beer makers, malt manufacturers handle an intensive germination and kilning process. Malt is merely barley that has had the chance to sprout and dry. The manner in which roasting time, temperature, pH, concentration, sugar, and nitrogenous compounds are handled makes a world of difference in each malt’s flavor chemicals.
Base malts are used in most instances, while specialty malts are offered to those looking to craft different flavors. Character and depth are added when these types of malts are utilized. Meanwhile, malt extract is available, letting a brewer skip the mashing process and start boiling. Pale, white or amber extract is chosen based on the flavor profile that the home brewer is looking to enjoy.
Hops
Hops are responsible for the flavor and aroma of the beer in question. Once the essential oils have been broken down in boiling wort, this is what gives beers their signature flavor, aroma and bitterness. Other brewers may decide to use the dry-hopping technique, which is when the hops are added post-fermentation for added flavor and aroma.
Bacteria and Yeast
Fermentation nuances usually come down to the type of brewer’s yeast that is used. Brewer’s yeast produces a wide range of other compounds, including esters, fusel alcohols, ketones, and various phenols and fatty acids, all of which profoundly affect the character of a beer. Wild bacteria and yeast are very hit or miss, so be careful. The flavors that are produced may be outweighed by the amount of effort and risk that are required. Cross-contamination should also be avoided as much as possible.
Water
Of course, water is the most obvious ingredient of all. pH, hardness, alkalinity, and residual alkalinity are the main factors that need to be considered when starting a home brewing project. Hard water needs to be avoided because it makes it very hard for the brewer to successfully raise a lather.
Adjuncts
If the home brewer needs a source of fermentable sugars, adjuncts are the way to go. They serve as a much cheaper alternative to malted grains and produce a much lighter beer that is less malty. Adjuncts can also be chosen in a manner that gives the final product its own unique character.
Fining Agents
These compounds are added as a means of improving clarity. The agents attach themselves to various contaminants, allowing them to settle at the bottom of the beverage. They are added in the fermenter or at the end of the boil, depending on the agents that are chosen.
If you are a beer enthusiast, brewing beer at home can be an exciting hobby. This is because you will enjoy a beer made through your ingenuity, and you can experiment with various beer ideas. If you are looking to start brewing beer at home, there are essentials that you must have. These are:
Fermenter
This is a container where you can store the wort and let it ferment into beer. There are numerous fermenters available in the market today, each with its unique strengths and weaknesses. Make sure that you choose a fermenter that suits your homebrew desires.
Airlock and Bung
An airlock does what its name suggests. It’s lodged in an opening on top of the fermenter, and it works to let the carbon dioxide produced during the fermentation out and prevent contaminants from getting in. In most fermenters, a bung is used to secure the airlock in place. If you don’t install an airlock in your fermenter, pressure can build up inside, resulting in the lid popping off. In the worst case, the pressure can cause the fermenter to explode.
Brew Kettle/Pot
A brew kettle is essential homebrew equipment as it’s what lets you boil the fermented wort and extract the brew. To avoid boilover, you need to pick a brew pot that’s a little larger than the quantity of your expected fermented wort. A 6 to 20 liter (1.5 to 5 gallon) brew kettle is sufficient for most home uses. Going for a larger brew kettle is the right move if you plan to scale up your home brewing operations.
Siphon and Tubing
A siphon and tubing are excellent ways to move hot wort or finished beer around. This will save you the hard work of lifting and pouring large quantities of hot wort or finished beer and the difficulty of cleaning the spilling mess that comes with it. If you are willing to invest a little more in your home brewing operation, you can pick up an auto-siphon. This homebrew equipment pumps liquid from one container to another using vacuum pressure. This means that it doesn’t introduce contaminants or oxygen into the beer.
Hydrometer
A hydrometer is a piece of equipment that measures gravity or sugar density in your wort or beer. Although you can homebrew your beer without a hygrometer, this equipment allows you to have precision in monitoring fermentation. As a result, you will have more control over the alcohol content of your beer.
Cleaner and Sanitizer
After every home brewing cycle, you must diligently clean all the homebrew equipment. It’s advisable to use an unscented cleaner. A sanitizer is used to clean all microorganisms from the equipment. It’s best that you use a no-rinse sanitizer.
Do You Need a Winery Chiller in Eugene and Portland?
Welcome to American Refrigeration. We provide top-class commercial heating, ventilation and cooling services. For the last 26 years, we have served clients in the Eugene and Portland areas by providing HVAC repair, medical laboratory equipment and winery chillers. Our interactions with our clients are guided by honesty and integrity, and we honor manufacturer rebates and warranties. We also offer 24/7 emergency repair services. Call us today.
There is nothing like a cold beer on a hot summer’s day. However, a hot beer does not pull the same punch.
The serving temperature of beer can have a significant impact on its flavor and overall enjoyment. Beers that are too cold can taste bland and unappetizing, while those that are too warm can become overly sweet and syrupy. Let’s find out more about beer temperatures and production.
Ideal Temperature
The ideal serving temperature for most beers is between 45 and 55 degrees Fahrenheit. This range allows the beer to retain its carbonation and prevents it from becoming too sweet. Beers that are served too cold will often taste watered-down, while those that are served too warm can become cloying and heavy.
Ales vs. Lagers
The two main types of beer, ales and lagers, are brewed at different temperatures and have different ideal serving temperatures.
Ales are typically brewed at warmer temperatures, around 60 to 75 degrees Fahrenheit, while lagers are brewed at cooler temperatures, around 45 to 55 degrees Fahrenheit. As a result, ales are typically served slightly warmer than lagers.
Pouring Temperature
The temperature of the beer can also impact the way it is poured. Beers that are too cold will often foam excessively when poured, while those that are too warm will not foam as much.
The ideal pouring temperature for most beers is between 45 and 50 degrees Fahrenheit.
Storage Temperature
In addition to serving temperature, the storage temperature of beer can also impact its flavor. Beers that are stored at too high of a temperature can become oxidized, while those that are stored at too low of a temperature can become skunked.
The ideal storage temperature for most beers is between 45 and 55 degrees Fahrenheit.
Brewery Equipment
The type of brewery equipment you use can have a significant impact on the quality of your beer. For example, using stainless steel brewing kettles will help to prevent your beer from becoming oxidized, while using copper brewing kettles can give your beer a more distinct flavor.
It is important to choose the right type of brewery equipment for your beer, to ensure that it tastes its best.
When it comes to brewery equipment installation, it is important to choose a reputable and experienced company like American Refrigeration Inc. Bad installation may result in poor quality beer or even equipment failures.
Final Thoughts About Beer Temperature and Equipment
When it comes to brewing beer, there are a few things you need to keep in mind to ensure that your beer turns out tasting its best. Paying attention to serving temperature, pouring temperature and storage temperature can all help to improve the flavor of your beer. In addition, using the right type of brewery equipment is also important. By following these tips, you can ensure that your beer tastes great every time.